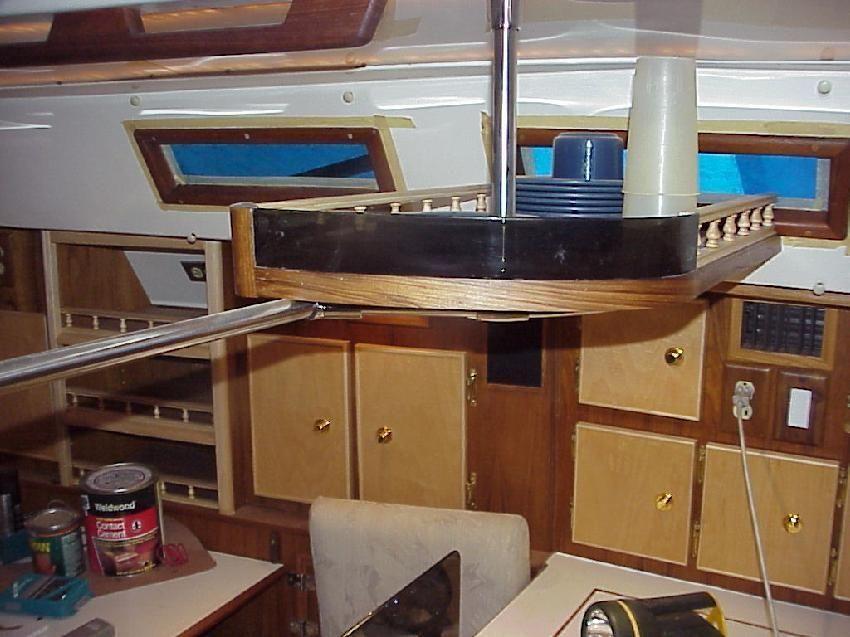
33.
Another view of the dishrack
The following text is a description of the dishrack
construction. Several folks have asked about it so I'll put my last answer online.
The dishrack is hung from the vertical grab rail. You have to install one of those
first. Any size or shape that suits your boat is fine. We placed an assortment of our
dishes on pattern paper and just stylized the shape we wanted. The wood is two
pieces of half inch teak plywood. Only one side is teak on each board. The teak faces
out, of course, then the boards are glued together after a wire chase is routed in one
of the boards. The chase is sandwitched inside of the two joined boards. The angle against the cabin top was 15 degrees, if memory serves me right. Let's see, what else? I routed the rack to accept the plastic. I built a mold to the shape of the curve and heated the plastic in our kitchen oven to bend it around the mold. (I used three layers of plywood to build the mold to the shape I wanted) Then the plastic was rounded with a bench sander (on its' top edge) and buffed on my bench grinder. Take note of the way the stainless rails are bent and mounted. (see photo #21)
They are working well. I have dowels to install on the rack to keep dishes in place but
we haven't needed them. Oh, the trim seen nearest the camera is teak made from a piece of scrap. It is sanded to a taper like a sail batton so that it follows the French curve of the rack without breaking. That's a must or you have to use a solid teak plank to get that finish with this curve. Now if there was just a way to run the lighting wires to the switch without having to break out of the hull. Then that teak trim covering the wires wouldn't be needed. Not on a Hunter 34, bummer.