63.
See how the bracket extends to the rear of the anchor locker lid cutout? That way it serves to hold up the remaining locker door. It is not spongy. It fact, I tweaked it and it is now perfect. It didn't previously fit well as built by the factory. The cut off forward piece of the anchor locker door, under the windlass is permanently located. I had to shim it with a couple of washers because I didn't have help holding the stainless bracket in place when I installed it. Oh well.
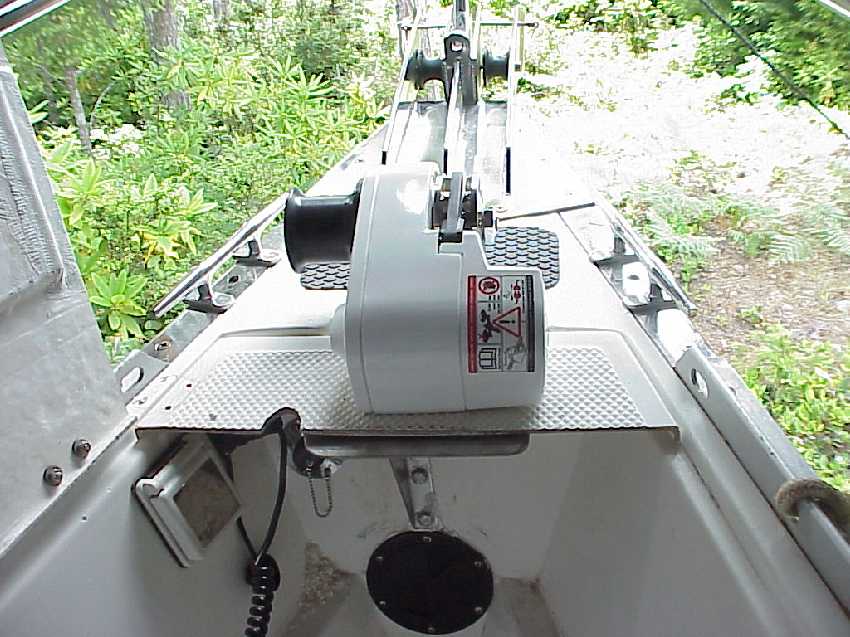
You can also see the shore power inlet. I installed that about 18 years ago. We use a short power cord and can easily leave it behind for day sails. When in a 'different' marina, this setup allows us to reach farther to a power box or moore more conveniently. You can also see the access port.
Seatrials proved that I HAD TO cutout the bottom of the locker to accept the chain. There just wasn't enough room for the 100' of 1/4" high-test in the locker and we ADDED another hundred feet. The hull was already altered and ready for this modification. (New drain hole) I used my Milwaukee angle grinder. No sweat. Everything works great. See photo #73.
9-19-4 The access port is GONE! After a month in Canada in and around Desolation Sound, it became evident that the chain would not fall fairly into the locker. It was building up on the wall under the windlass and jamming the gear unless the chain was manually pushed over. It was evident that the wall, to the top of the inspection port, had to go. I also had to cut away the port and starboard side of the locker from the top of the port, rearward at an angle to the rear of the bottom cutout. Make sense? Drop me a line if it doesn't and I'll take another picture. The result is now the chain self flakes automatically. I'm still running this setup from the bow so as to monitor its' operation but it has been perfect for two dozen retrievals now. (I posted a picture, see #133)